Prerequisites
Before we start, ensure you have the following:
- An AWS account.
- AWS CLI installed and configured.
- Visual Studio or any preferred IDE.
- .NET Core SDK installed.
Step 1: Setting Up AWS Credentials
First, you need to generate AWS credentials (Access Key ID and Secret Access Key) from the AWS Management Console.
Log in to AWS Management Console
Navigate to the IAM (Identity and Access Management) service.
Create a new user: Under "Users," create a new user with programmatic access.
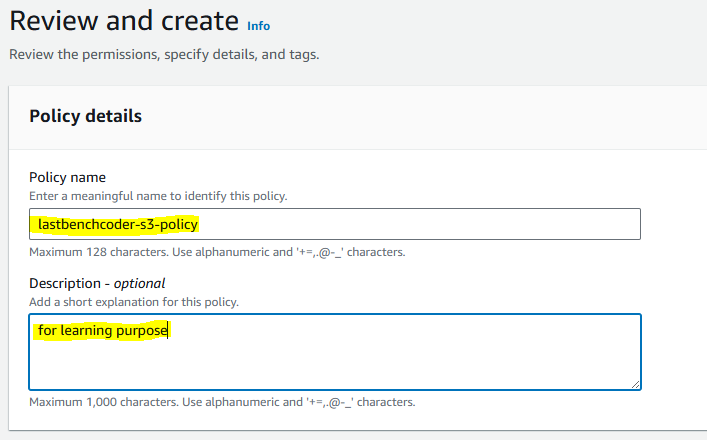
Attach policies: Assign necessary permissions to the user, such as AmazonS3FullAccess.
Finally, user created with S3 bucket full List access
Click on user and go to Security Credentials
Go to access keys section and click on Create access key.
Select other and click on next
Enter the description of key and Submit "Create access key"
Access Key Created successfully
Finally go down and Save credentials: Store the Access Key ID and Secret Access Key securely.
We are done, we have create the user with user group and assigned the S3 bucket all list access policy.
Step 2: Installing AWS SDK for .NET
Install the AWS SDK for .NET using NuGet Package Manager or by running the following command in the terminal:
dotnet add package AWSSDK.S3
dotnet add package AWSSDK.Extensions.NETCore.Setup
builder.Services.AddDefaultAWSOptions(builder.Configuration.GetAWSOptions());
builder.Services.AddAWSService<IAmazonS3>();
Create API Controller AmazonS3Controller and Go to Controller(AmazonS3Controller) and add the properties and end point to list all the folders or files from S3 bucket.
using Amazon;
using Amazon.Runtime;
using Amazon.S3;
using Amazon.S3.Model;
using Microsoft.AspNetCore.Http;
using Microsoft.AspNetCore.Mvc;
using System;
using System.IO;
using System.Linq;
using System.Threading.Tasks;

namespace AwsS3BucketAPI.Controllers
{
    [ApiController]
    [Route("[controller]")]
    public class AWSS3Controller : ControllerBase
    {
        private readonly AmazonS3Client _s3Client;
        private const string BucketName = "lastbenchcoder-bucket";
        // Replace with your S3 bucket name

        public AWSS3Controller()
        {
            // Initialize the AmazonS3Client with access key, secret key, and region
            var awsCredentials = new BasicAWSCredentials("ACCESS_KEY", "SECRET_KEY");
            var config = new AmazonS3Config
            {
                RegionEndpoint = RegionEndpoint.APSoutheast2
                // Specify the appropriate region
            };
            _s3Client = new AmazonS3Client(awsCredentials, config);
        }

        [HttpGet("list")]
        public async Task<IActionResult> ListBuckets()
        {
            try
            {
                var response = await _s3Client.ListBucketsAsync();
                var bucketNames = response.Buckets.Select(b => b.BucketName);
                return Ok(bucketNames);
            }
            catch (AmazonS3Exception ex)
            {
                return StatusCode((int)ex.StatusCode, ex.Message);
            }
            catch (Exception ex)
            {
                return StatusCode(500, ex.Message);
            }
        }

        [HttpPost("create-folder")]
        public async Task<IActionResult> CreateFolder([FromBody] string folderName)
        {
            try
            {
                var request = new PutObjectRequest
                {
                    BucketName = BucketName,
                    Key = folderName.EndsWith("/") ? folderName : folderName + "/",
                    InputStream = new MemoryStream(new byte[0])
                };

                await _s3Client.PutObjectAsync(request);
                return Ok($"Folder '{folderName}' created in bucket '{BucketName}'.");
            }
            catch (AmazonS3Exception ex)
            {
                return StatusCode((int)ex.StatusCode, ex.Message);
            }
            catch (Exception ex)
            {
                return StatusCode(500, ex.Message);
            }
        }
    }
}
In this article, we've covered how to integrate AWS S3 with a .NET Core Web API to create folders and upload files. By following these steps, you can effectively leverage AWS S3 for scalable object storage in your .NET Core applications. This setup allows for flexible and secure management of files and folders in the cloud, enhancing the functionality and scalability of your applications.
By implementing these practices, you can build robust cloud-based solutions that leverage the power of AWS S3 to store and manage your application data efficiently.
.png)


